Getting Started
The Checkout API (Payment Gateway API) allows for the collection of online payments with many payment methods. The Checkout API is easy to integrate – simply use one of our methods and the checkout processes will be performed automatically.
The Checkout API works by sending a payment request to Paysera’s servers with payment parameters listed in the further documentation chapters. After the integration, your website’s customer will have the opportunity to choose from all of your desired payment methods. Once the payment is made, the customer is redirected to the ‘thank you’ page provided by you. Once the payment is confirmed, we send the relevant information back to your website.
Step 1. Read the documentation
First of all, before continuing you should read the documentation to find out if you are looking for the right tool.
Step 2. Get Paysera account
Both test and real payments are made in Production, which is used as a real environment. To obtain an account register in Paysera.
test=1 parameter to the payment request.Step 3. Order Payment collection service
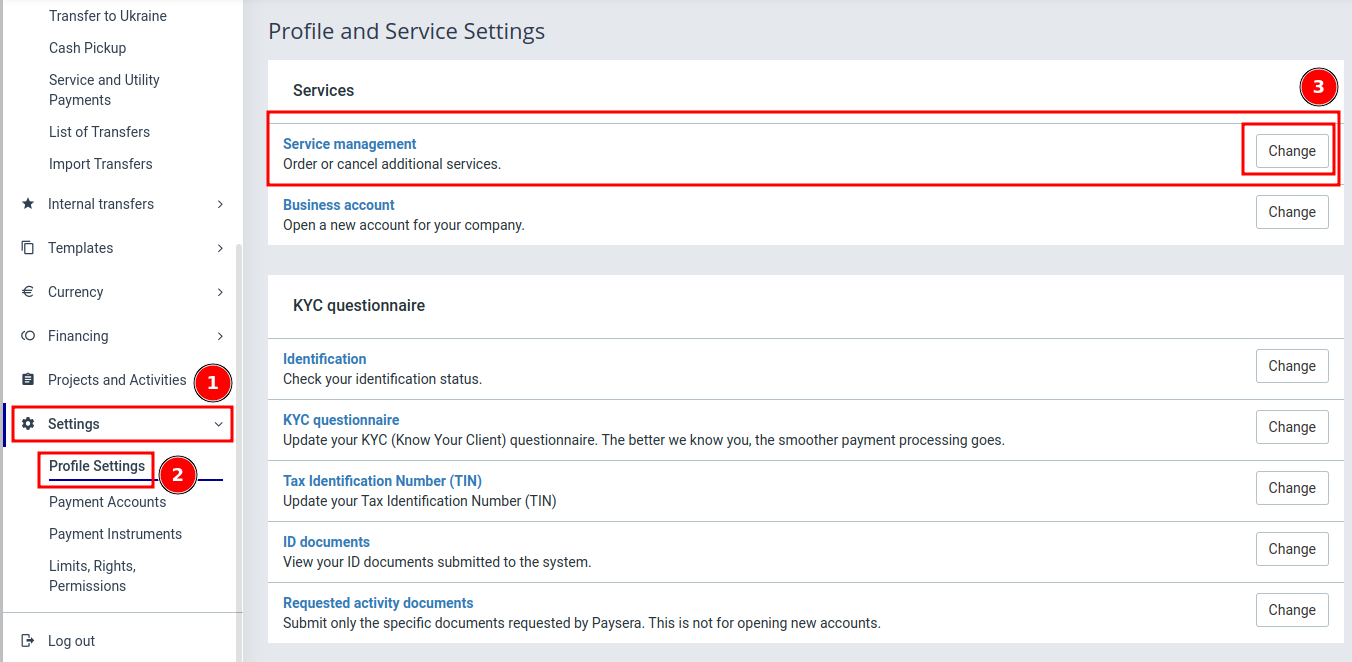
Log in to your created account and follow these steps:
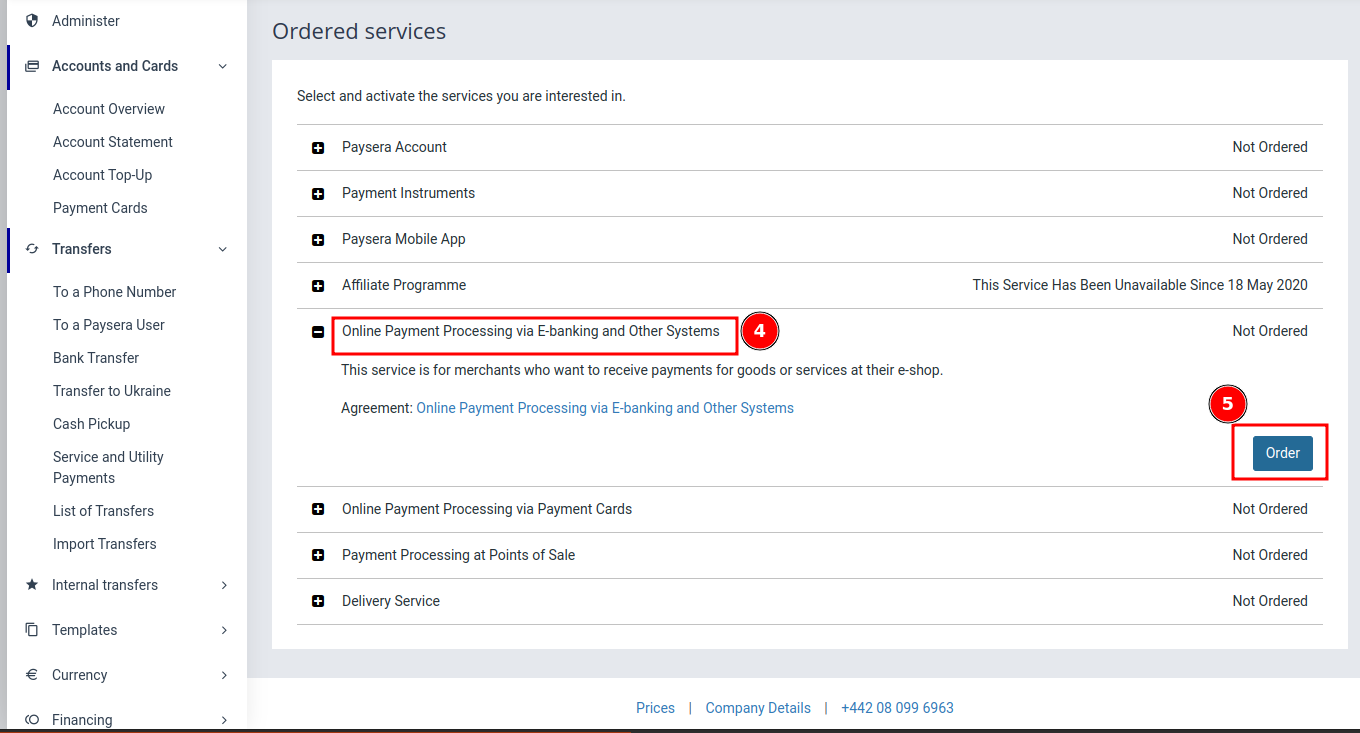
Settings -> Profile Settings -> Service management ->
Online payment collection via e-banking and other systems -> Order.
If you are interested in payment collection with credit cards, you should order Online payment collection via payment cards.
Step 4. Create a project
In the left-hand menu, select Project and Activities -> My projects.
If this section is not visible, reload the page. To create a new project, click Add new project.

Step 5. Add Website to the project
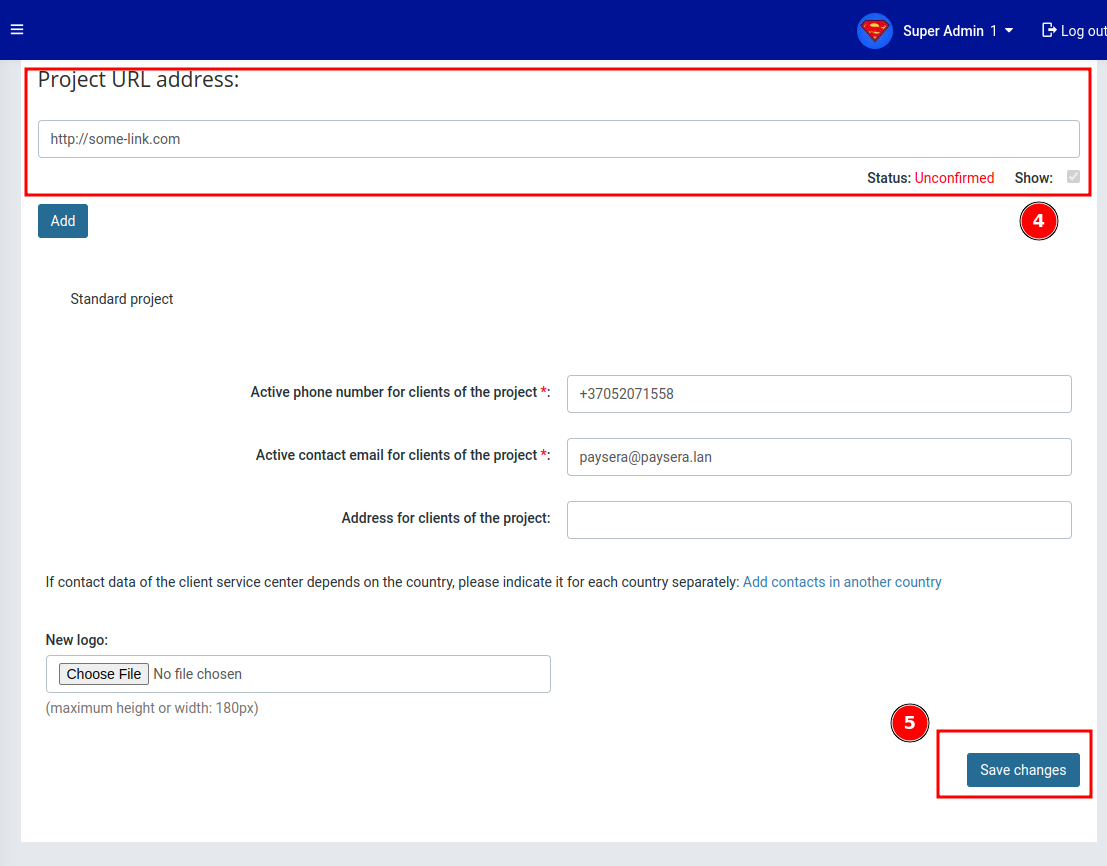
For safety reasons it is required to add your website to the project settings and confirming your ownership of said website. This way your project will accept payments only from your website/s. To confirm your website ownership read the step below.
Select Project settings -> General project information. Type in your website address and press Save changes.
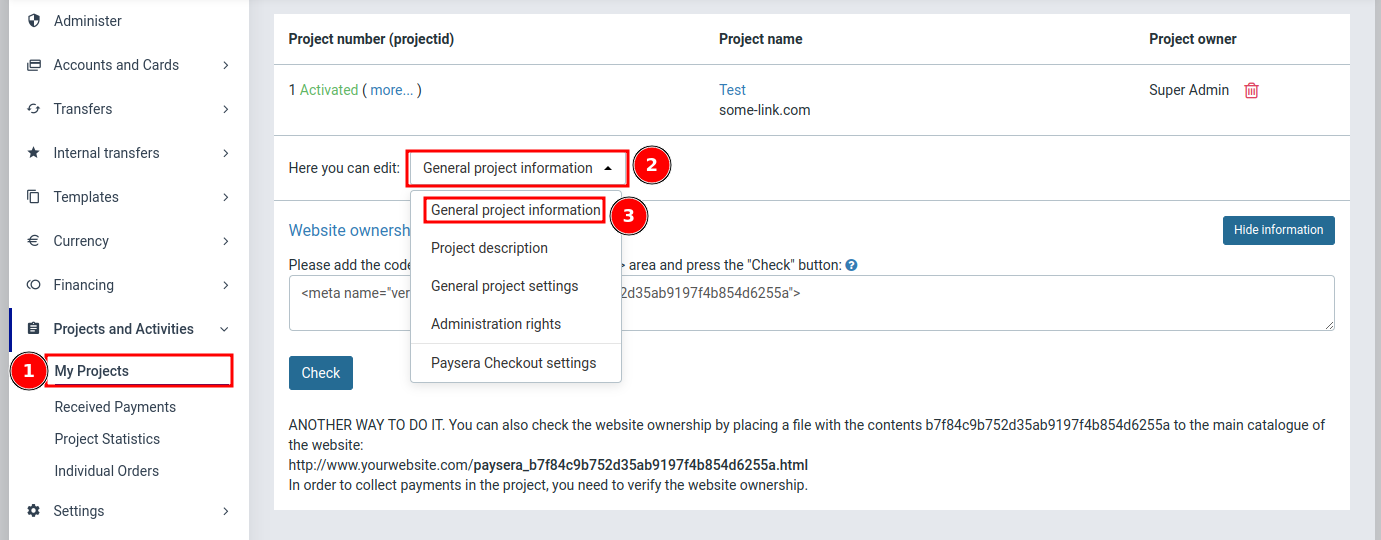
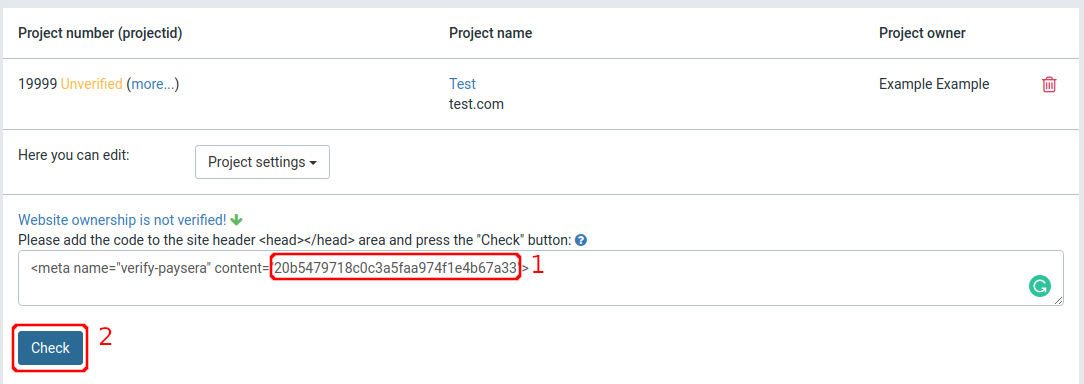
Step 6. Confirm website ownership
To confirm website ownership, you must use the website ownership code, which is located in the project settings. You can place it in the head section of your website or upload a file to your website’s main catalogue.
If the check for the ownership code fails, you can contact Paysera Technical support, don't forget to add Project Id into the mail, for a manual check. Email: tech_support@paysera.com
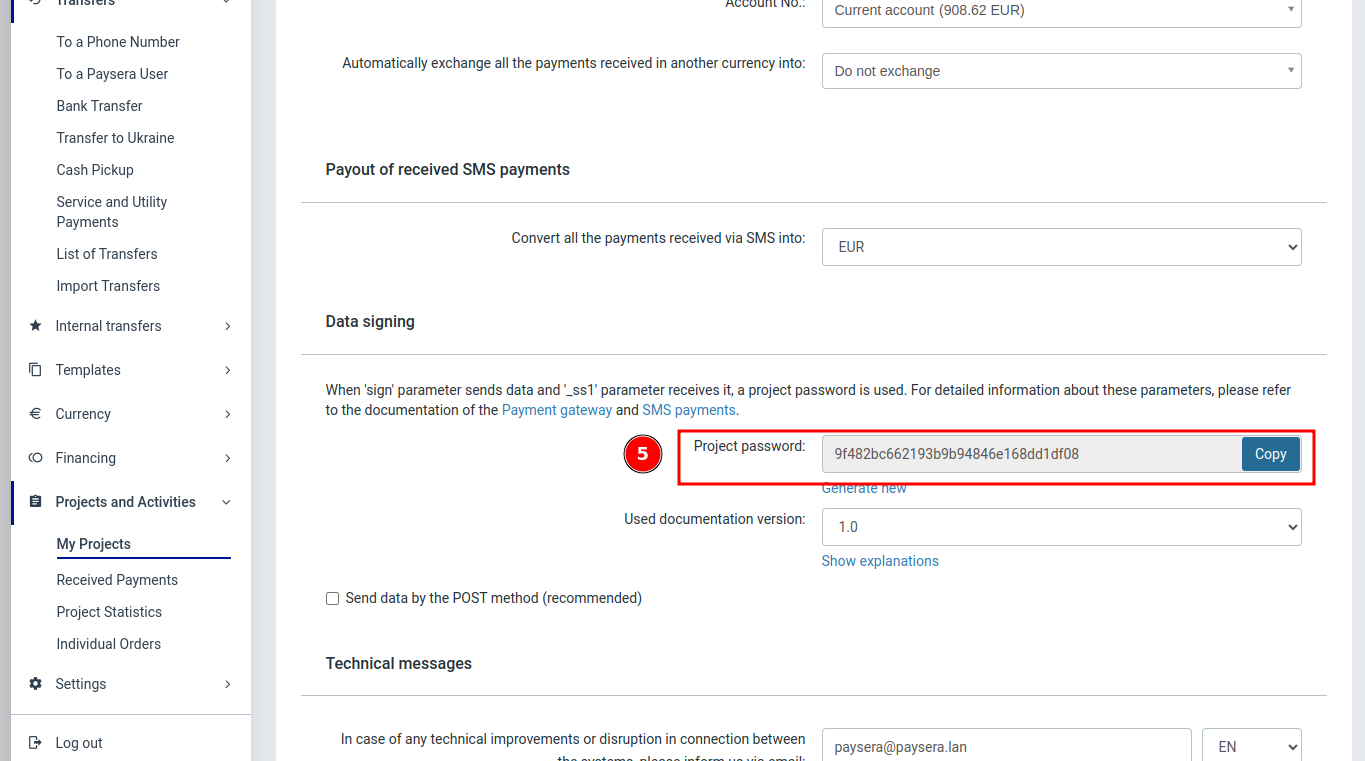
Step 7. Integrate
Depending on the type of your website, you can select one of the available methods to integrate - see the chapter Integrations.
For the integration you will need project_id and sign_password.
Both of these parameters are listed under Project settings -> General project settings.
If you encounter any errors during or after the integration process, see the chapter - Error codes for possible solutions.